In this article, we will learn how to enable JUnit 5 in a newly created Spring Boot project. We are going through the following steps:
Initialize new Sprint Boot project
Having a look at our pom.xml and mostly on sprint-boot-starter-test dependency, going a little deeper in spring-boot-starter-test and see what JUnit version it uses
How to exclude child dependency that comes from one of our dependencies using Maven
Add JUnit 5
Migrate JUnit 4 to JUnit 5
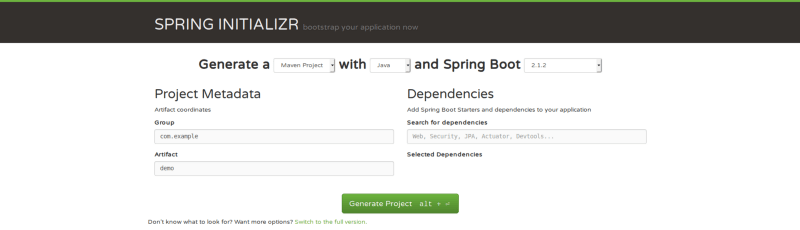
1) First, let’s go to Spring Boot initialize and generate a new project.
The defaults should be fine and you can click the “Generate Project” button. You should have downloaded a .zip archive of the starter Sprint Boot project. Unzip it and open it with IDE of your choice (I am using IntelliJ and the following code samples and examples will be shown from it). After opening it, you should see the following structure:
2) Now let’s focus on the pom.xml.
In our pom.xml we can see the following dependency which includes libraries (such as JUnit, Hamcrest, and Mockito) for testing Spring Boot applications.
We are going a little deeper to see the exact dependencies and their versions focusing on junit with which spring-boot-starter-test comes (in IntelliJ you can do this by Ctrl + click onto spring-boot-starter-test. In the snippet below, we can see that sprint-boot-starter-test comes with JUnit 4.12 but there is JUnit 5 already. So how can we use the newer version of JUnit in our new Spring Boot project?
3) We should have a way to exclude JUnit 4 because we are currently depending on it because of spring-boot-starter-test. We can do this by adding the following lines to our spring-boot-starter-test dependency by which we exclude JUnit 4.
5) We have removed the dependency of JUnit 4, we have added JUnit 5 and now it is time to make a little code changes in order to use JUnit 5. Let’s focus on DemoApplicationTests.java where we can see the following code
@RunWith(SpringRunner.class)
@SpringBootTest
public class DemoApplicationTests {
    @Test
    public void contextLoads() {
    }
}
Actually, the only things that we have to change are the RunWith annotation because it’s from JUnit 4 and the import of Test annotation. After the change, our test should look like